Tuesday, January 31, 2006

Making Scales 108

Ok... Leave your scales as oversized as you can. You can always sand material off... can't put it back once it's gone. With that in mind, flatten the insides first. They don't have to be perfect. Then profile them back to the metal. BARELY to the metal. Forgot what profile is? Guess you'll just have to go back and find it in 101 thru 107.

Sand the material side of the scales uniformly for thickness. Both of them. Use calipers if you don't have the eye for it. Also make sure there is no twist to the material. In other words... don't have scales that measure .12 at the right front, .11 at the left front, .10 left back, and .12 at right back. If you don't quite follow what I just said, let me just say... you be lopsided, fool. I don't do mm, so don't ask me to convert these measurements for you. :-)

Once that is done, cut out some fiber liner material in your choice of colors. This stuff is also called spacer material. Before you epoxy anything to the scales, drill those 1/16 holes through the liner and material side of the scales on one side only. This is so you don't lose track of the holes once the fiber liner goes on.

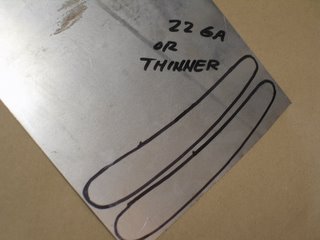
You can see the outline of the black liner I chose for these scales. Putting this thin material over steel will help protect it from rust. You will not have to do this with brass, gold, silver, or aluminum. It's still a nice touch, and I use it for brass and copper too. If you do use the black fiber, it will still need to be sealed later. I actually use the thin super glue for this process. A few drops near the end, then spread it with anything round that you can throw away after using it. I use wood skewers for bbq stuff.


Spread epoxy on the scales, then apply the black liner material over the metal liner. Do this for both halves of the scales. Use mini clamps again to keep everything together until it cures. I clamp right and left scales together. Just don't put epoxy between the black liners. That would be ugly. Remember, you are making two scales, not one.

You should be looking like this:


After the epoxy has cured, remove the clamps and separate the scales. Sand the insides lightly for flatness. Then profile them again.

Now, you are going to put rubber, notice I said rubber cement between the scales directly on the black liner material.

Fit them together at the divider line of the scales. Do not line them up at the heel or the pivot end of the scales.


It is here that you would be wishing you hadn't jumped the gun by drilling the holes on the other half of the scales. Cause, guys... they just won't line up. If everything did line up, go buy some lottery tickets cause you done been a lucky sumbich. (street talk grammar... I talk that way too, sometimes)

You may be off as much as in these photos, and that's ok. Remember... you should be making things slightly oversized. It is of the utmost importance, though, that you line up both scales at that dividing line between the different materials of the scales.

In these two photos, I don't have the black liners in yet. I took the pics at this stage cause I figured I may forget about it later. Just pretend you see the black liners sandwiched between the scales.

This is what I was talking about:


I'm going to repeat what I said just a bit ago...

Rubber cement the two halves together at the divider line of the scales. Do not line them up at the back or the pivot end of the scales.


What we are doing is making ONE scale...
temporarily.

Tuesday, January 24, 2006

Making Scales 107


Pick the set of scales you want to put on the razor and sand the inside surfaces flat. Just the insides. I know that I don't have to tell you to pick the best looking surfaces of the scales for the outside. Once that is done, draw an outline of the liner directly onto the material being used. In this case, that is the oosik.

In the example here, I have made the lines very thick just for illustration purposes. After you have done this for both halves, use the band saw or scroll saw to cut them out.


Cut out the other pieces you are going to use on the top half of the scales up near the pivot pin. In this case, I am using dyed green/blue/yellow stabilized maple. Sand the edges of all the pieces down to the profile of the lines that you drew. Just leave the smallest of line showing. Everything will be slightly oversized for now. The only thing that has to be sanded very close is the dividing lines between materials.

Cut out a piece of spacer material to go between the oosik and the stabilized maple. You can get this stuff in sheets at the following web site.

http://www.knifeandgun.com/catalog/spacer_materials_186709_products.htm

The stuff I used here is about a 16th of an inch. You can laminate different materials together to create a little more contrast. Epoxy them together as a unit and sand the sides lightly and the edge of one side flat before you use them as a spacer here. It makes things easier and eliminates gaps that have a tendency to show up when gluing multiple pieces together.

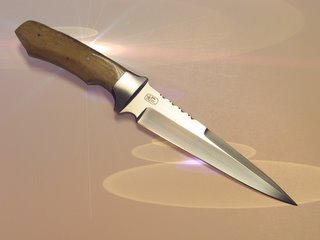
To show you what I am talking about, check out the following spacer combination I used on this hunting knife. I still have this one for sale, by the way.


Epoxy all the pieces together using a good quality product. I always use T-88 on every knife I make. I'm not a great fan of the 5 minute epoxies, but in addition to the regular line of 24hour epoxy, T-88 came up with one that has met my standards thus far.

Here is but one place you can get the stuff:

http://tinyurl.com/db2mb


Use clamps to keep the materials in place. Leave them until the epoxy sets. The clamps can even be paper clips, as you can see. Those things come in handy for a lot of things.

Let me say this right now. If you think you can use "Gorilla" glue... forget it. I am sure there is a use for that stuff somewhere, but it will never be in my shop... for anything.

When the epoxy is cured, you will have something like this. Notice that nothing is very pretty right now.


It's at this point that you will start sanding stuff down. First, go for all the stuff that really sticks out. Work your way around a little here and there until you get down to something that looks like a single slab.

Do not worry about the profile right now. The profile is considered the outline or edges of the scales.

It will start to look something like the pic below. When we are all done, you find that there is no real mystery to doing this stuff.

Monday, January 23, 2006

Making Scales 106

Once you have both sides of the liner roughed up a little, it's time to check some fits. Most important is the relationship of the blade to the liner. Most 6/8 and smaller razors will fit within the confines of just about any razor scale silhouette. But, once you get to 7/8 and 8/8, there is a whole new program going on. You need a tad more length and a little more width. Keep what has worked for you around in the form of templates. You can use something as simple as paper or something a little more durable, like plastic or metal. Don't forget to mark them.

In the following picture you will see the blade, a third-pin bead and the liner in its tenative size. Here is where you see if everything is going to work together.


Take a measurement from another razor to kinda give you a starting point for the pivot pin hole. Put the hole in the tang over the that portion of the liner. Don't mark it yet. Move it around til it looks right. Liner too small? MAKE ANOTHER ONE! If not, continue by placing the bead in the crook of the blade and tang. This is what will keep the blade from swinging too far into the scales and exposing a sharp edge on the other side.


Ideally, the bead should wind up along the centerline of the liner. Take the blade off temporarily to see where it is at. Anything more than a 32nd of an inch off line, and you should probably move the bead toward the pivot pin so it is close to the centerline. Or, get or make a larger diameter bead. The tolerances in this project are very close because I am making scales for a Henckels 8/8 blade.

If things look good, mark the pivot pin location and the third pin hole location with a permanent marker. No, it doesn't have to be a permanent marker. It can be a pencil. Before moving anything yet, also mark the limits of the swing of the blade on the butt of the liner. When that is done, mark the line where the spacer will be attached about a 16th from the blade swing line. Ignore the dot for the hole in the spacer for now.


Make your spacer a tad less than half of the thickness of the blade. Then sand it with the slightest bit of a taper from flat side to the round side. A couple of degrees is fine. It does not have to be measured. Remember, do what looks good. Make the outline fatter than what it needs to be, but sand it close to the lines of the profile.


Now I want you to drill the pivot pin hole and the third pin hole on this one liner only. Once you get the hang of this stuff, you won't want to drill any holes until you are about ready to put the scales on a razor. We are doing it here because it is important that you don't lose the relationship between the holes. Just for a reference, the line next to the third pin on the liner is about 3/8 of an inch away. This distance can vary, depending upon the size of the materials you have available. Most look the best and are most functional, though, between 3/8 and 1/2 inches away. Mark and drill the hole next to the third pin. Leave the spacer pin hole in the butt of the liner out of it for now.


OK, guys... It's here that you need to participate a little. I only know if you are interested in this info by the comments that are left. They don't have to be long, but it would be nice to have some feedback. Something as simple as "Cool, right on, more detail please, less detail, thanks... etc" I also want to know if I am giving too much info, or not enough. I want to be thorough, but don't want to put you to sleep either. I am doing this for your benefit, not mine... I already know how to do this stuff. I'm thinkin' I may withhold the last session or two and email them to those who have at least taken the time to leave a single comment.

Tuesday, January 17, 2006

Making Scales 105

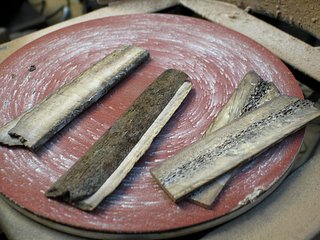
Ok, where did we leave off. I think it was with the three sets of scales sitting on the horizontal sanding disc. Onward and upward. For the project here, I picked the set to the far left in the picture. That would be the second set of scales as they were cut on the band saw.

Next is picking the liner material. The thinner the better... within reason. .001 won't cut it. I don't think I would pick anything thicker than 1/16 of an inch, either. Too much weight. If you pick standard weld stock from the small sheeting aisle of Lowe's, you will also have to line that too. If not, you will definitely have to keep an eye on the liners to keep them from rusting. Always keep them coated with some kind of oil after the scales are made and attached to a blade. Even if it's vegtable oil. If they are without protection, they will rust overnite. No joke. Don't, I say, don't oil them during the construction of the scales. Epoxy and super glue do not stick very well to oily surfaces. Remember, there are also choices in lining material. You can pick weld steel, brass, or aluminum from most of the major hardware stores. If you wanted to get really really really fancy, you could get silver or gold too. Let's not use those two while you are learning, ok? Draw an outline from the size scales you want to make on the sheet steel.


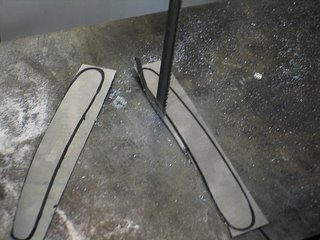
Now cut them out. If you don't have a metal band saw, take an old 1/8 inch blade and put it on your wood band saw, crank up the speed to the max and friction cut them. If you don't know what I was just talking about, use a standard hand held jig saw with a metal blade, or a coping saw with a metal blade.


Stay on the outside of the lines. This is a rough cut. Once you have done that, sand to the inside of the lines using that handy-dandy Sears belt/disc sander you just bought for this class. This does not have to be perfect. The metal will also curl a little. Don't worry about it yet.


Notice that I am using a 1 inch belt on my sander that has a capacity for 2 inches. I like the flexibility of the narrower belt. You can really crank out some work this way. I use the "slack" area of the belt a lot... a lot. A lot.

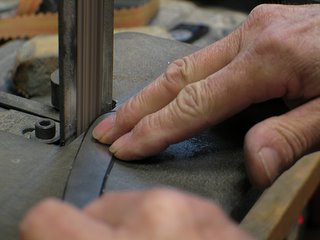
You can grind inside curves with the narrower belts easily. 2 inch will work too, but get yourself some 1 inch belts in 120 and 220 and 400 grits. In the following pic, I am grinding on the trailing edge of the belt. In simpler terms, that's from the right side of the liner to the left side of the liner while moving the whole shebang from left to right. The right side of the belt is doing the work. Think ahead when holding anything up to a fast-moving 120 grit belt. It removes flesh just as easily as metal and wood.

Once the liners are pretty close... close, not perfect, they will look something like this little french fry critter:


Flatten it out on a flat surface using a wood roller like this one.


Now sand both sides to make the surface look like a place any respectable epoxy would want to spend some time and become intimate with. Keep in mind that fresh sandpaper creates less heat than worn out paper. Notice I use no gloves for this process. It's just something I've gotten used to. If it's too hot to hold, I stop... then there is no danger of ruining anything because of the heat.


OK... That's all ya get for now. Ask your questions now if you have them. But only for the stuff we have covered, not about anything we haven't gotten to yet. I won't have time to come back after we are done to explain anything. Kinda like if you don't pay attention in class, you don't graduate. There will be a pop quiz at the end. You will be required to pass this test if you ever plan on attending one of my weekend workshop extravaganzas.

Monday, January 16, 2006

Making Scales 104

Well... Chris decided to take the scales, so this is what he gets:


Now that you have seen the beginning and the end, I will get back to telling you how to get your scales to look like this. Stay tuned...

Sunday, January 15, 2006

Making Scales 103

Just so y'all know... This is what your scales will look like when we are done. This set may go to Chris, but don't know for sure. If he doesn't want them, they will be for sale as a set or I will put them on an 8/8 Henckels blade I have. Anyway, what do you think?


Saturday, January 14, 2006

Single Piece Set of Scales

Here's a one piece set of scales that I just finished up for Chris using a 7/8 Henckels blade. The scales are desert ironwood. Not too bad...


Making Scales 102

Don't be afraid to leave comments, everyone. It's the only way I know anyone is interested in this drivel. I would like to know if this info is helpful because it is going into the update to my CD. Especially ask questions on things that were already covered. Sometimes I just assume that some of the things I do are common knowledge. That may or may not be the case. In addition, if you have a tip you would like to add to the process, let me know. Some of you guys have some very good ideas. If you don't want to say anything on this blog, email me at officerE@comcast.net.

The next photo shows the small ridge lines left on the material from the band saw. These are the ones that need to be taken off by the sanding stages. If you don't have a disc sander, an upside down mounted belt sander would work. So would a regular stationary belt sanding model. The real throw-back would be a 12 by 12 inch block of granite to be used as a flat base for sanding paper. 100 grit wet/dry paper would be fine for this process. You can get 12 by 12 blocks of granite at any good leather hobby store. They are used as a base for tooling leather.


Once you have flattened the slab, it should look something like this...


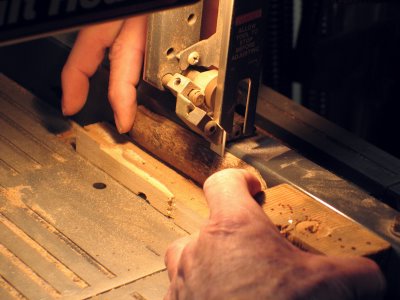
Now it is time to slice the two halfs into matching scales. To do that, we use the rip fence of the band saw, jig saw, or scroll saw. The jig saw being the last choice. Actually a table saw would be the last choice. Using that would eliminate one set of usable scales entirely.
I set the rip fence to approximately 1/8 of an inch. Remember, there are more sanding steps, so some of this 1/8 of an inch is going to disappear. Notice the piece of wood beneath the piece of oosik. That is used as a support to the thin slices that will be made. Otherwise, the larger slot in the table of the saw allows too much movement of the material as it is being cut. I hope that made sense.

I keep forgetting to say something about the appearance of my workshop area. It normally does not look this messy. I am in the process of packing everything up for the move to my new house, which means everything is coming off the walls and out of the storage cabinets. My move is tentatively scheduled for the second week in April. I have been taking the things I figure I won't need and taking them to a storage unit that is only a mile away from the new house. Of course, once it has been moved to storage, I wind up needing it...
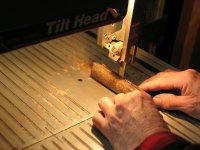
Once you have cut one half of the material into equal slices, do the other one. This particular piece of oosik gave three sets of usable scales. Not too bad. Keep the matching sets together. Also keep in mind that this piece of oosik was only about 4 1/2 inches long. It was going to be used for a knife. But, it is of no consequence because this blog is how to make scales with liners. Oosik is probably strong enough to be used without liners if it is long enough. But, I think you would have to have a solid 1/8 inch finished dimension to make them work. Remember, this stuff can be found in two foot lengths, so keep an eye out for it. Knife shows are your best resource.


End of Making scales 102. Comments please...

Monday, January 09, 2006

Making Scales 101


DISCLAIMER!! Your injuries are your own, not mine. Accidents happen. Be mindful of what you are doing and they will happen less often. I am assuming it is a given that I wouldn't have to warn you about getting your fingers in front of a moving band saw blade. This is how the work is done, not a safety course.

OK, Guys... please be mindful of my copyright material. I don't mind if you print this instruction out for yourself. But I do not want any of this information to be used in any publications or other web sites without my permission.

The material picked for this set of scales is oosik. You may have run across it in the restoration section called New Hybrid with Oosik Scales. This is a different piece, and don't know myself how good this set will come out. I am taking pics as I go. For those who don't know, oosik is the bone from the penis of a walrus that has been dead so long, the material has fossilized. Not petrified... fossilized. It has been one of my favorite materials for handles/scales on my knives.


The procedure for making scales is basically the same, no matter what material you decide to use. Knowing how to make a set with liners will enable you to pop out those single piece scales with ease.

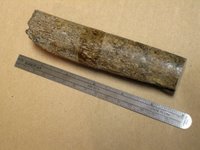
Oosik comes in different colors and sometimes in lengths of two feet. How cool is that? White to brown and sometimes with other colors in the bark generated by minerals in the soil where the creature came to his final resting place. The bark is the outermost section. Here is the piece we will be working with.


Okeedoke. Draw a line down the center of the material with a sharpie. If you need instructions on how to find the center, you may want to skip the rest of these instructions. I am going to assume that those interested in making scales have a basic understanding of working with common tools. Please don't take it as an insult if you are the one who needs to skip the rest of the instructions. I just won't have time to explain every little detail. I did not measure mine... I just eyeballed it. I have always adopted the premise that if it looked good, it was good.


If you do that, you sometimes pay the price. It turned out that I was off by a 32nd of an inch after making the third set of scales from this material and I will be lucky if I am able to use the best part of the bone, which is the outer bark. The reason I say better is because that is usually where all the color and character of the boner is seen. I happen to like the inner section where all the blood vessels were just as much because I can use different color epoxies to fill in the spaces.


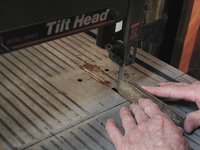
Make the cut down the center of the sharpie line you drew on the bone on your band saw. No band saw? Bummer. But you can still do this. My next choice would be a scroll saw. Those are only about a $100, sometimes less. Try, though, to get access to the band saw. It makes this part a piece of cake. I know I don't have to tell you to be careful. Cut slowly, and watch out for your thumbs. I do this free hand. If you want to figure out a taper jig or use a rip fence, that's ok too.

Here we are about half of the way through. If you are not wearing a mask by now, I'm thinkin' that you wished you had. The worst case of flatulence has nothing on this stuff when it is cut or being ground down.


Once you get all of the way through, it will look like this.


To get the most out of this material, you are going to need at least 1/8 of an inch thickness for each set of scales. Set your rip fence on your band saw to that thickness. Before you go to slicing any more, however, you need to sand both halves of your material flat. Notice I said flat. It does not have to be smooth. Wear a dust mask at the very least. A cartridge type of respirator is much better if you have one.

I made up a horizontal 9 inch sanding disc specifically for this type of sanding because I do a lot of it. You can accomplish the same thing with a vertical one that has at least a 6 inch disc. There are combination belt/disc sanders at, where else, Sears. That tool will also be in the photos here pretty soon. Here is the horizontal one.

This concludes Making Razor Scales 101... to be continued with 102.

Are you learning anything?

Sunday, January 08, 2006

Any Questions


Well... I am still learning how to publish this stuff on this blog. Keep in mind that I am a slow learner.

Before I go any further, I need to let you all know that there are many things that I have also learned from you guys on the various forums I have frequented on a semi-regular basis. Some of those tips will be included here once in a while. I will give credit to the person I got the info from.

If there is a specific topic you would like me to address, post it in one of the comment sections of this blog. Ask questions. If I have an answer... I will give it. I will not blow smoke up your ass if I don't, however. And if I don't know, I will tell you that also. If it's one of those things that I would have to google to give a response, you are on your own. You can do that as well as I can. And if that's the case, come back with an answer, and I will post it here for you... with your name in lights.

Also understand that I have a life outside of straight razors and this blog... and forums. I may not always be punctual with posts and such. I also have a CD to update and a book on the jail to write. Good thing I'm retired...

Saturday, January 07, 2006

In the Beginning


Okedoke... I am getting my ducks in a row. I will try to update this blog thingie at least as often as I get lucky. Well... maybe a little more than that.

This specific drivel is only to get the blog going for me to figure out adjustments. I will start to post some info on how to make scales (handles) for those straight razors you got on eBay.

I'll start you out with something like these:


Are you ready?