Making Scales 107

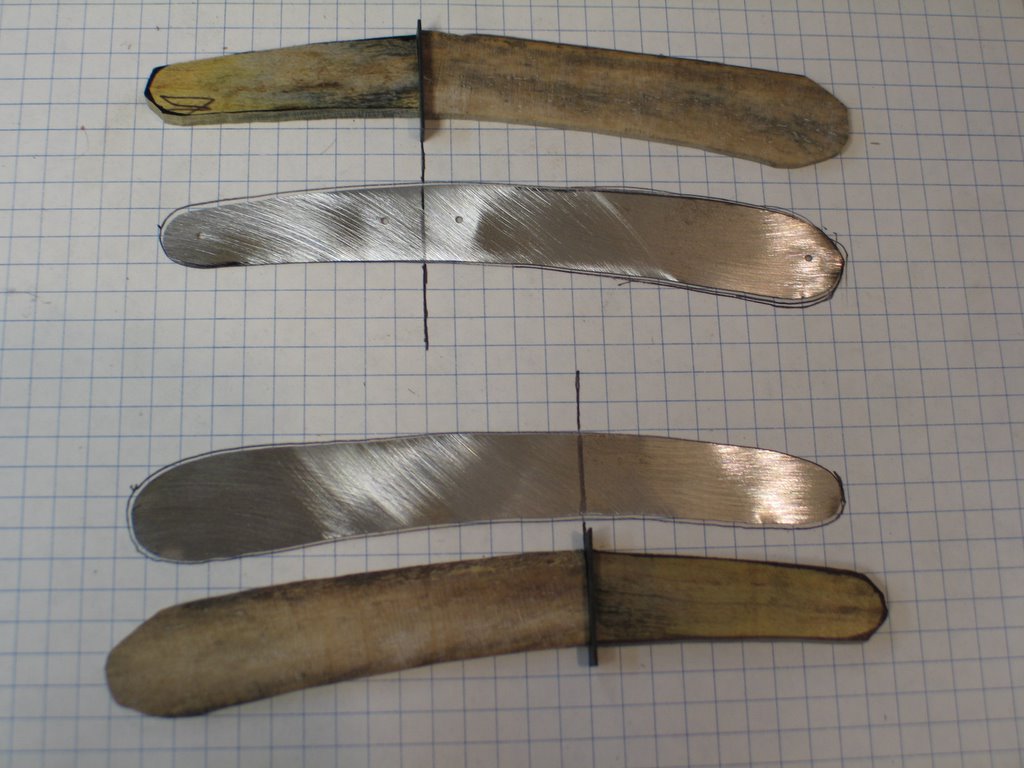
Pick the set of scales you want to put on the razor and sand the inside surfaces flat. Just the insides. I know that I don't have to tell you to pick the best looking surfaces of the scales for the outside. Once that is done, draw an outline of the liner directly onto the material being used. In this case, that is the oosik.
In the example here, I have made the lines very thick just for illustration purposes. After you have done this for both halves, use the band saw or scroll saw to cut them out.

Cut out the other pieces you are going to use on the top half of the scales up near the pivot pin. In this case, I am using dyed green/blue/yellow stabilized maple. Sand the edges of all the pieces down to the profile of the lines that you drew. Just leave the smallest of line showing. Everything will be slightly oversized for now. The only thing that has to be sanded very close is the dividing lines between materials.
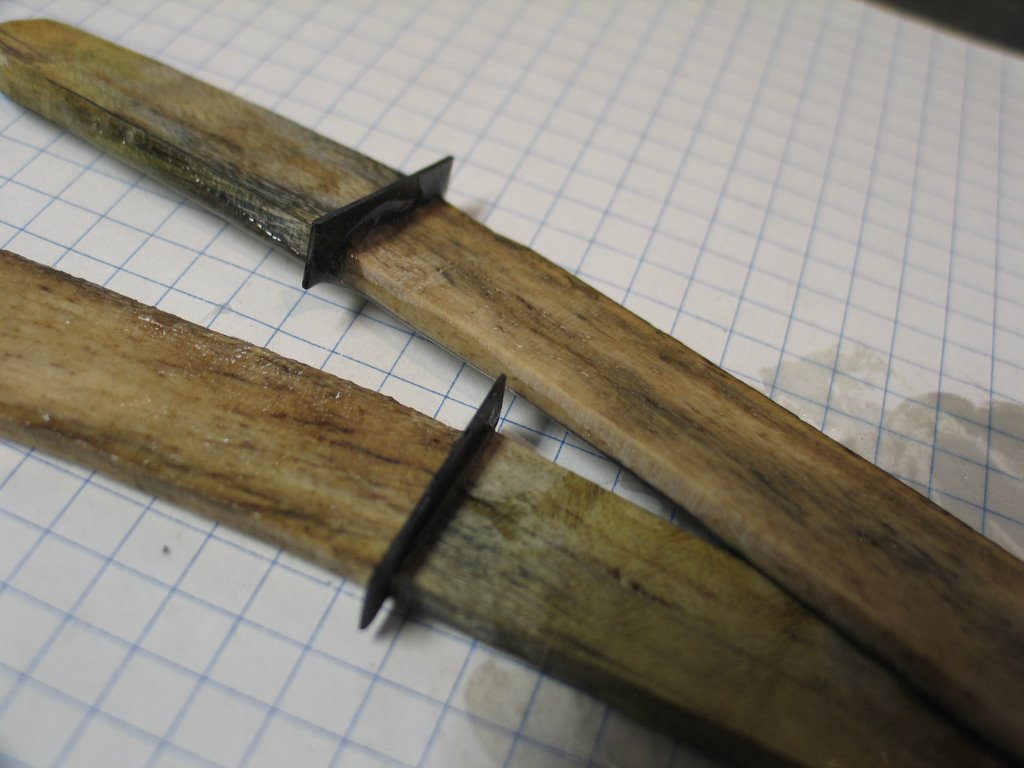
Cut out a piece of spacer material to go between the oosik and the stabilized maple. You can get this stuff in sheets at the following web site.
http://www.knifeandgun.com/catalog/spacer_materials_186709_products.htm
 The stuff I used here is about a 16th of an inch. You can laminate different materials together to create a little more contrast. Epoxy them together as a unit and sand the sides lightly and the edge of one side flat before you use them as a spacer here. It makes things easier and eliminates gaps that have a tendency to show up when gluing multiple pieces together.
To show you what I am talking about, check out the following spacer combination I used on this hunting knife. I still have this one for sale, by the way.

Epoxy all the pieces together using a good quality product. I always use T-88 on every knife I make. I'm not a great fan of the 5 minute epoxies, but in addition to the regular line of 24hour epoxy, T-88 came up with one that has met my standards thus far.
Here is but one place you can get the stuff:
http://tinyurl.com/db2mb
 Use clamps to keep the materials in place. Leave them until the epoxy sets. The clamps can even be paper clips, as you can see. Those things come in handy for a lot of things.
Let me say this right now. If you think you can use "Gorilla" glue... forget it. I am sure there is a use for that stuff somewhere, but it will never be in my shop... for anything.
When the epoxy is cured, you will have something like this. Notice that nothing is very pretty right now.
It's at this point that you will start sanding stuff down. First, go for all the stuff that really sticks out. Work your way around a little here and there until you get down to something that looks like a single slab.
Do not worry about the profile right now. The profile is considered the outline or edges of the scales.
It will start to look something like the pic below. When we are all done, you find that there is no real mystery to doing this stuff.

posted by Bill at 6:37 PM
![]()
![]()


5 Comments:
Bill, I may not get a chance to check your writings every night but rest assured, I am watching you! [grin]
So far I feel the detail level is just about right but I will holler if something is unclear or I just need more info...
Chris aka Kaptain_Zero
Bill, I just located your blog on making scales. Please continue as this information is greatly appreciated!! Im really anticipating the process of the pinning the razor together. Thanks for the work.. D
great info concisely stated!
More details on pre-epoxy surface prep would be nice. Hopefully you still check this thing every once in awhile.
I have heard that it can be tough to get a good bond between epoxy and aluminum.
Also, do you just rough up the surfaces with sandpaper? I have heard of people drilling divots or scoring the material with a razor to give the epoxy a better bond (it gets grooves to dry into). Shearing forces, where the scale is slid off of the liner, are supposedly the weakness of epoxy (divots and grooves would make this sliding more difficult).
What I am most interested in is any chemical treatment that you may apply before epoxy. Mineral spirits/turpentine/alcohol/etc.
Mr. Anonymous -
Rough the surfaces to be epoxied with a 120 grit sandpaper. Clean the surface with denatured alcohol and don't touch the surface again with your fingers. Most important is to mix the epoxy well. You need more than a couple swirls through the mix with a stick. Also use pressure to clamp things together. I use four of those small spring clamps on one set of scales. Leave to cure over night regardless of whether it's 5-minute, or 24-hour epoxy. If you wind up with tacky surfaces anywhere, it's because you didn't let them cure long enough, didn't mix well enough, or the epoxy went past the expiration date. Trust me, it does expire.
Post a Comment
<< Home