Making Scales 105
Ok, where did we leave off. I think it was with the three sets of scales sitting on the horizontal sanding disc. Onward and upward. For the project here, I picked the set to the far left in the picture. That would be the second set of scales as they were cut on the band saw.
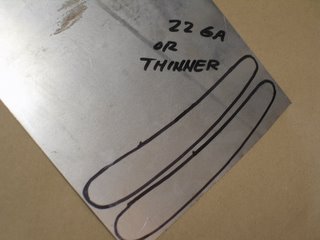
Next is picking the liner material. The thinner the better... within reason. .001 won't cut it. I don't think I would pick anything thicker than 1/16 of an inch, either. Too much weight. If you pick standard weld stock from the small sheeting aisle of Lowe's, you will also have to line that too. If not, you will definitely have to keep an eye on the liners to keep them from rusting. Always keep them coated with some kind of oil after the scales are made and attached to a blade. Even if it's vegtable oil. If they are without protection, they will rust overnite. No joke. Don't, I say, don't oil them during the construction of the scales. Epoxy and super glue do not stick very well to oily surfaces. Remember, there are also choices in lining material. You can pick weld steel, brass, or aluminum from most of the major hardware stores. If you wanted to get really really really fancy, you could get silver or gold too. Let's not use those two while you are learning, ok? Draw an outline from the size scales you want to make on the sheet steel.
Now cut them out. If you don't have a metal band saw, take an old 1/8 inch blade and put it on your wood band saw, crank up the speed to the max and friction cut them. If you don't know what I was just talking about, use a standard hand held jig saw with a metal blade, or a coping saw with a metal blade.
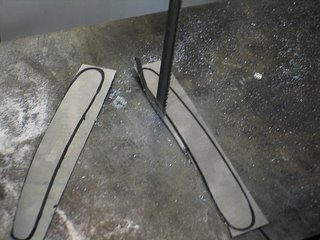
Stay on the outside of the lines. This is a rough cut. Once you have done that, sand to the inside of the lines using that handy-dandy Sears belt/disc sander you just bought for this class. This does not have to be perfect. The metal will also curl a little. Don't worry about it yet.
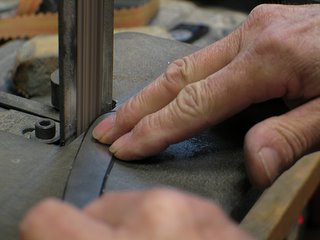
Notice that I am using a 1 inch belt on my sander that has a capacity for 2 inches. I like the flexibility of the narrower belt. You can really crank out some work this way. I use the "slack" area of the belt a lot... a lot. A lot.
You can grind inside curves with the narrower belts easily. 2 inch will work too, but get yourself some 1 inch belts in 120 and 220 and 400 grits. In the following pic, I am grinding on the trailing edge of the belt. In simpler terms, that's from the right side of the liner to the left side of the liner while moving the whole shebang from left to right. The right side of the belt is doing the work. Think ahead when holding anything up to a fast-moving 120 grit belt. It removes flesh just as easily as metal and wood.
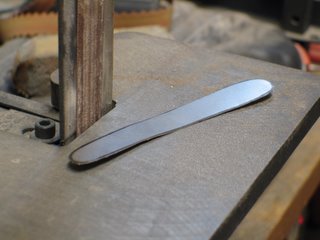
Once the liners are pretty close... close, not perfect, they will look something like this little french fry critter:
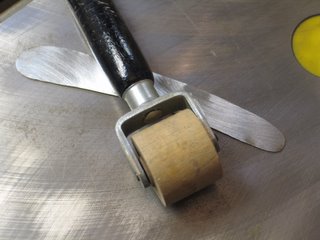
Flatten it out on a flat surface using a wood roller like this one.
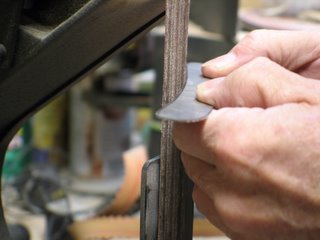
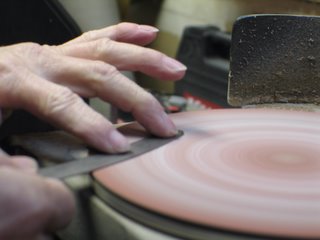
Now sand both sides to make the surface look like a place any respectable epoxy would want to spend some time and become intimate with. Keep in mind that fresh sandpaper creates less heat than worn out paper. Notice I use no gloves for this process. It's just something I've gotten used to. If it's too hot to hold, I stop... then there is no danger of ruining anything because of the heat.
OK... That's all ya get for now. Ask your questions now if you have them. But only for the stuff we have covered, not about anything we haven't gotten to yet. I won't have time to come back after we are done to explain anything. Kinda like if you don't pay attention in class, you don't graduate. There will be a pop quiz at the end. You will be required to pass this test if you ever plan on attending one of my weekend workshop extravaganzas.
posted by Bill at 9:35 PM
![]()
![]()


6 Comments:
You mention to cover the liner with an oil when not using because it will rust...WHat about after the scales are constructed, will you have to worry about the liner rusting?
Don't worry about oil until there is a blade attached to the scales. Don't oil before that because epoxies and super glue don't work very well on oiled surfaces.
So, the liner is still susceptible to rust even after the scales are constructed?
The liners will most definitely rust on the exposed surfaces. Unles of course, the liners are aluminum, copper, silver, gold, or other non rusting material. I will cover more on this later.
To cut my aluminum scales, I used an angle grinder with a cutting disc to get the rough shape (I think I left 1/16 to 1/8" on all sides of the outline). This will leave one hell of a burr. File it down to remove the burr, then sand it to remove the file marks.
This part was probably unnecessary, but I am OCD and wanted my liners to match perfectly (even though this could have been done after wood scales were attached). I used a bit of double sided carpet tape to secure the liners to each other, then sanded them a bit more until they matched perfectly. I then pried them apart and used Liquid Wrench to remove residual glue from the tape.
Mr Anonymous -
You seem to be creating needless steps. Rough cut the liners, no matter what the material is, epoxy them to the wood, use double-sided tape to hold the liners together, and then sand the whole kit and caboodle at one time. That will result in 4 perfectly matched scale profiles.
Post a Comment
<< Home