Making Scales 108
Ok... Leave your scales as oversized as you can. You can always sand material off... can't put it back once it's gone. With that in mind, flatten the insides first. They don't have to be perfect. Then profile them back to the metal. BARELY to the metal. Forgot what profile is? Guess you'll just have to go back and find it in 101 thru 107.
Sand the material side of the scales uniformly for thickness. Both of them. Use calipers if you don't have the eye for it. Also make sure there is no twist to the material. In other words... don't have scales that measure .12 at the right front, .11 at the left front, .10 left back, and .12 at right back. If you don't quite follow what I just said, let me just say... you be lopsided, fool. I don't do mm, so don't ask me to convert these measurements for you. :-)
Once that is done, cut out some fiber liner material in your choice of colors. This stuff is also called spacer material. Before you epoxy anything to the scales, drill those 1/16 holes through the liner and material side of the scales on one side only. This is so you don't lose track of the holes once the fiber liner goes on.
You can see the outline of the black liner I chose for these scales. Putting this thin material over steel will help protect it from rust. You will not have to do this with brass, gold, silver, or aluminum. It's still a nice touch, and I use it for brass and copper too. If you do use the black fiber, it will still need to be sealed later. I actually use the thin super glue for this process. A few drops near the end, then spread it with anything round that you can throw away after using it. I use wood skewers for bbq stuff.


Spread epoxy on the scales, then apply the black liner material over the metal liner. Do this for both halves of the scales. Use mini clamps again to keep everything together until it cures. I clamp right and left scales together. Just don't put epoxy between the black liners. That would be ugly. Remember, you are making two scales, not one.
You should be looking like this:
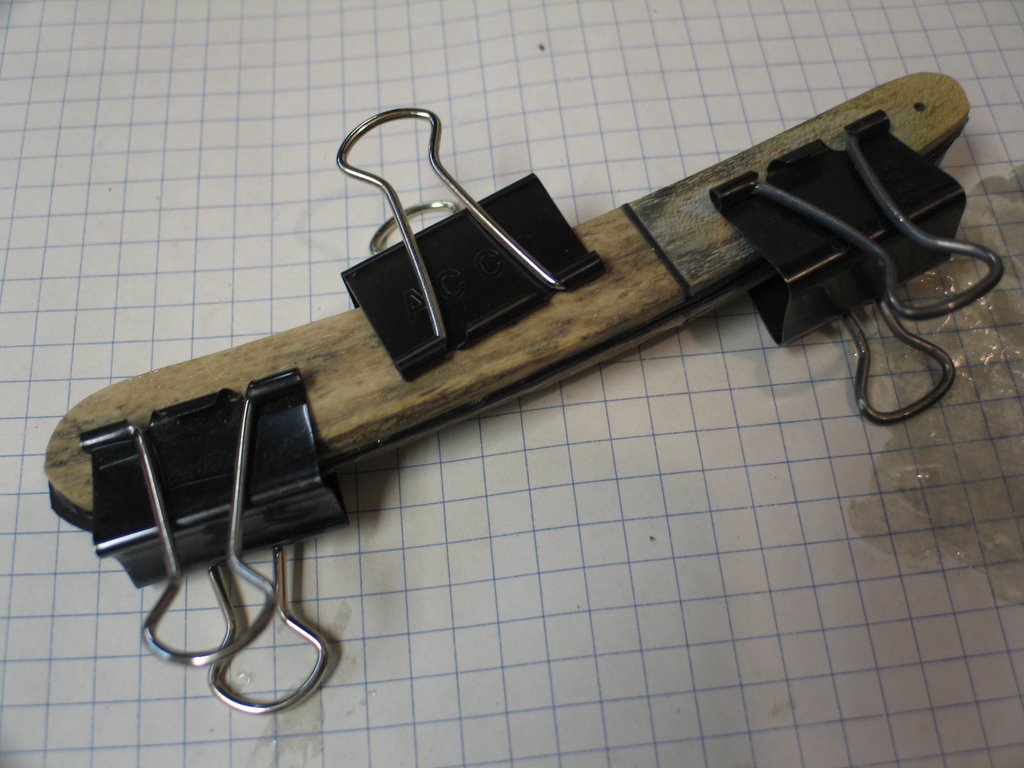
After the epoxy has cured, remove the clamps and separate the scales. Sand the insides lightly for flatness. Then profile them again.
Now, you are going to put rubber, notice I said rubber cement between the scales directly on the black liner material.
Fit them together at the divider line of the scales. Do not line them up at the heel or the pivot end of the scales.
It is here that you would be wishing you hadn't jumped the gun by drilling the holes on the other half of the scales. Cause, guys... they just won't line up. If everything did line up, go buy some lottery tickets cause you done been a lucky sumbich. (street talk grammar... I talk that way too, sometimes)
 You may be off as much as in these photos, and that's ok. Remember... you should be making things slightly oversized. It is of the utmost importance, though, that you line up both scales at that dividing line between the different materials of the scales.
In these two photos, I don't have the black liners in yet. I took the pics at this stage cause I figured I may forget about it later. Just pretend you see the black liners sandwiched between the scales.
This is what I was talking about:

I'm going to repeat what I said just a bit ago...
Rubber cement the two halves together at the divider line of the scales. Do not line them up at the back or the pivot end of the scales.
What we are doing is making ONE scale...
temporarily.
posted by Bill at 11:00 PM
![]()
![]()


3 Comments:
OK, Luke...
Remember now, you just can't look at the pictures. You have to read too. That info is in Making Scales 107. Shape up... pay attention...
:-)
Luke...
No apoligies necessary... I was just trying to be funny.
Thanks for this, it was very informative. I haven't started making a set yet but I'm going get some wood this weekend. It should make a nice winter project.
Post a Comment
<< Home